

The following steps explain how to set up your email account in the frogDisplay.
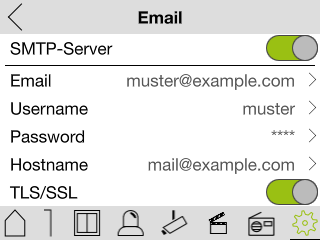
Step 1: Configure the SMTP server
Activate the SMTP server and enter your e-mail, user name and password.
The data for your SMTP server (outgoing mail) – such as host name or port – can be found at your respective provider.
Encryption via TLS/SSL is recommended.
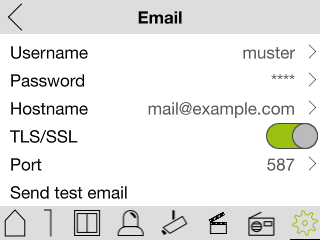
Step 2: Send a test mail
After completing all entries, you can send a test mail to check whether your account details have been entered correctly. This mail will then be sent to the registered mailbox.
Depending on the email provider, separate verification may be required (two-factor authentication).
Example: the Gmail SMTP server
praxistipps.chip.de wrote on 12.08.2016:
“If you receive your mails via POP3, use the address “pop.googlemail.com” (port 995) as incoming mail server. For outgoing mail use “smtp.googlemail.com” (port 465 or 587). For reception via IMAP, use the address “imap.gmail.com” (port 993). The outgoing mail server also changes to “smtp.gmail.com” (port 465 or 587). Note: For the incoming mail, select the standard SSL as encryption.” (Aschermann, T., 12.08.2016, Gmail: Set up incoming mail server and outgoing mail server, https://praxistipps.chip.de/gmail-posteingangsserver-und-postausgangsserver-einrichten_49178, retrieved 14.02.2022)